NOTE
You can read this here in Finnish.
Understanding internals of PicoOS environments
Recently I purchased a new gadget last year December, the Pico 4 Ultra virtual reality glasses, which had released in August of 2024. I like the device in many aspects, but the lack of ability to create or use custom themes was not there, I thought it would be a fun challenge.
That in mind, I decided to take on the challenge so I spent some time time figuring out how it's done, and documenting and implementing the tooling for other people. This article shows how I figured out how to do it, laying down my approach to analysis.
Fig 1: Video showcasing the Pico Environment Selection
The first step
Knowing that the Pico 4 Ultra runs a modified flavour of Android I was able to easily start digging into the system through adb.
NOTE
adb aka Android Debug Bridge is a tool for communicating with Android devices for development purposes.
Developer Mode
First, I had to enable developer mode, but this was suprisingly easy, all I had to do is;
go to Settings -> About -> Software Version (click 7 times)
and new Tab called "Developer" appeared which allowed me to enable "USB Debug" that enables ADB debugging.
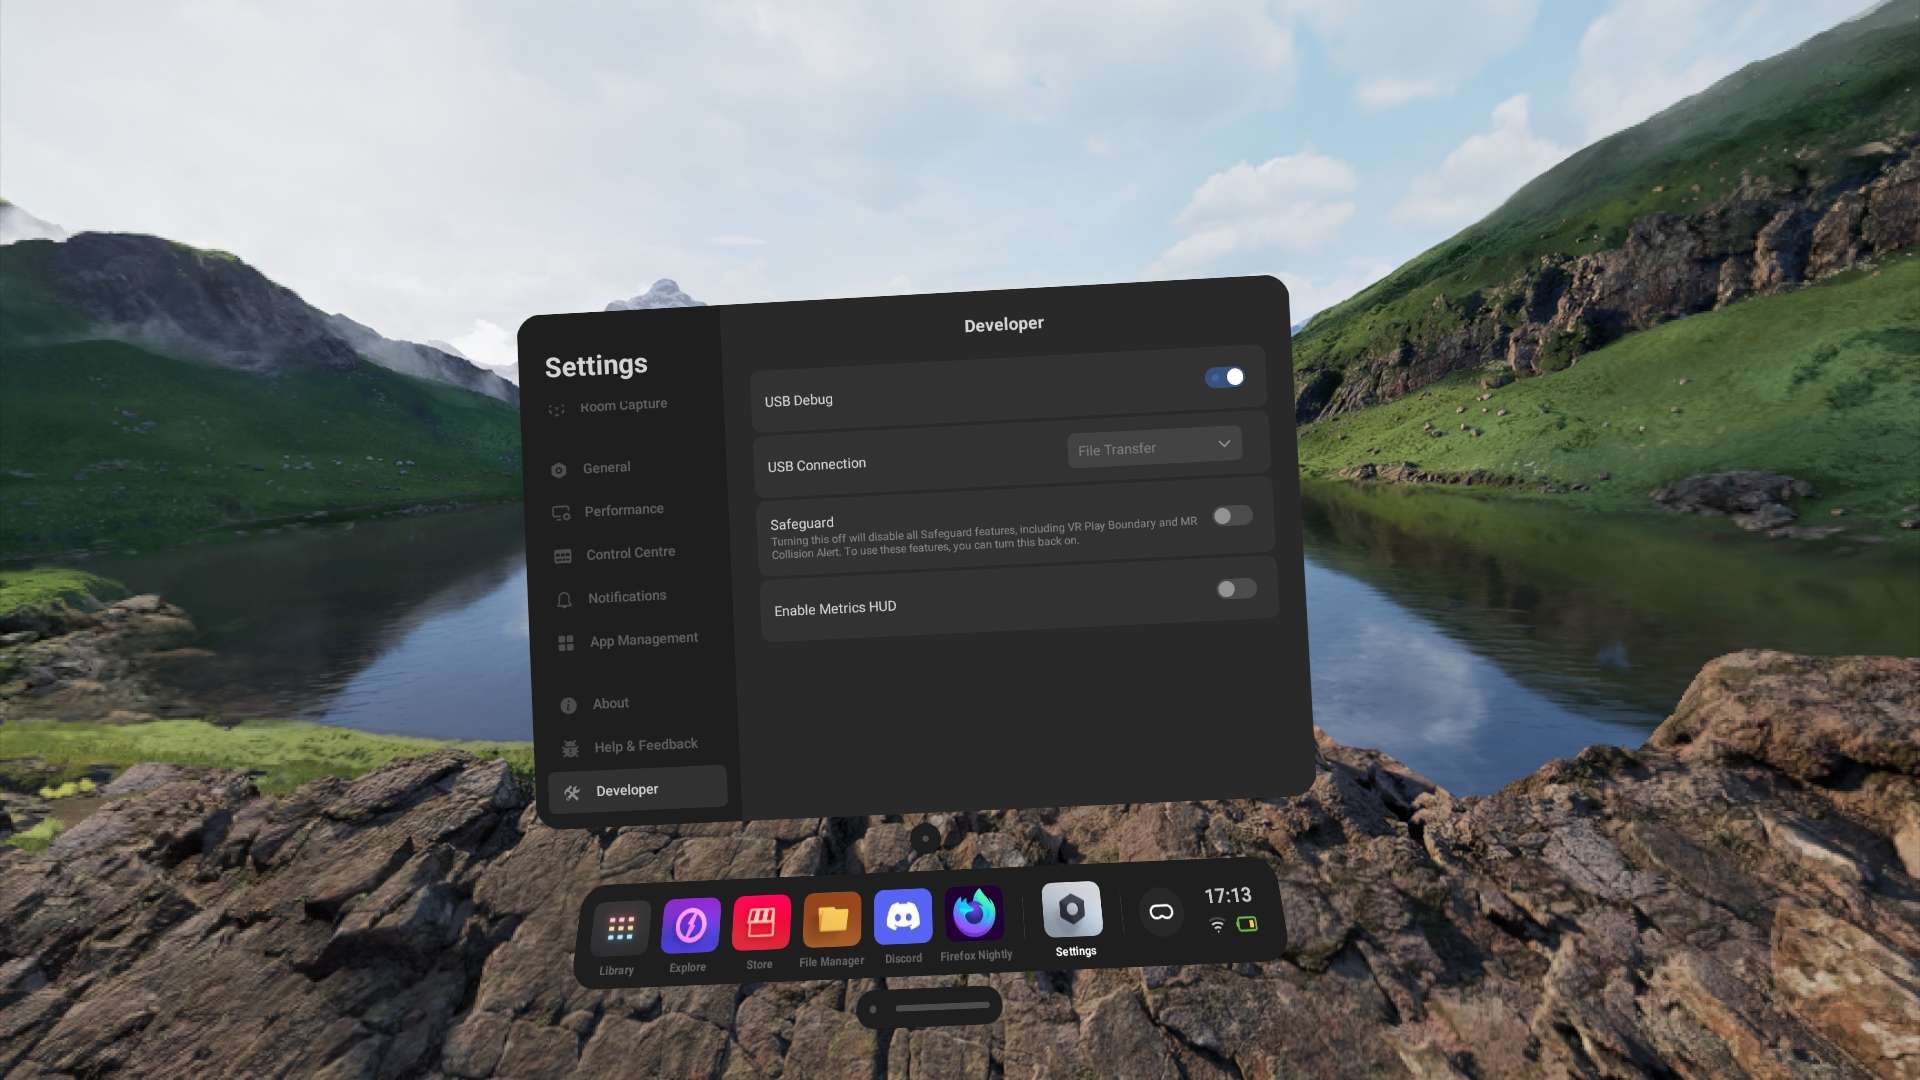
Fig 2: Developer Mode
Inspection of installed files
That in mind the next thing I did was dump to all the installed system packages through adb shell pm list packages and inspect the output:
// ...
package:com.pvr.ZeroIsland.scene
package:com.pvr.EnchantedLibrary.scene <--
package:com.pvr.MountainVilla.scene
package:com.pvr.MoonshadowDunes.scene
package:com.pvr.ZeroIslandNight.scene
package:com.pvr.WoodenHouse.scene
package:com.pvr.SeaviewVilla.scene
// ...
After digging the list for a while I can upon few particular packages that had the prefix com.pvr and suffix scene which name also matched the ones I had downloaded from the Environment Picker, so I had a reasonable suspect of these packages being the ones I am after.
I transfered one of the packages to my PC for futher analysis by first resolving the full path of the package with adb shell pm path and then copying the apk over with adb pull over to my PC.
Further analysis of the package
The first thing I did was decompile the apk with apktool to figure out the folder structure.
NOTE
Apktool is a tool for reverse engineering apk (Android Package) files which allows you to decompile and recompile apk(s).
package structure
assets
  -> scene
      -> {Name}
          -> Scene_{Name}_1_1.unity3d
  -> thumbs
      -> {Name}
          -> Scene_{Name}_1_1.png
res
  -> values
      -> integers.xml
      -> strings.xml
The package did not include any code, which mean it's a resource package that's some how read by a other system, looking at the structure what caught my eye was the .unity3d file as this is known format for the Unity Engine that in mind I looked through rest of the file structure.
integers.xml
<?xml version="1.0" encoding="utf-8"?>
<resources>
    <integer name="sceneType">1</integer>
</resources>
It contains sceneType that seems like it is used to define the type of the environment
strings.xml
<?xml version="1.0" encoding="utf-8"?>
<resources>
    <string name="SceneName_EnchantedLibrary">Enchanted Library</string>
    <string name="linkedPackageName">com.pvr.EnchantedLibrary</string>
    <string name="linkedUnlockKey" />
    <string name="linkedVersionIdentification" />
    <string name="sceneTag">EnchantedLibrary</string>
</resources>
It contains few string definitions that seem to be used for identification, this becomes important later on.
The unity3D file
I used AssetRipper to extract the bundle into a Unity project, it was also able to determine the targeted Unity version from the bundle metadata.
NOTE
AssetRipper is a tool for extracting serialized Unity Bundles and exporting them as Projects.
It suggested that the .unity3d file was created with Unity 2021.3.5f1 so I installed it with Android support.
Once I opened the project I saw countless of errors, so I installed Pico Unity Integration SDK to the project and the errors were gone.
Knowing that I needed Unity 2021.3.5f1 and Pico Unity Integration SDK I had all the knowledge to create my own bundle.
A failed attempt
The first thing I did after figuring out the format, was attempting installing a renamed package, it didn't show in the Virtual Environment tab.
I was starting to wonder, maybe the system doesn't like unknown signatures or maybe there is something else to it.
So I started digging into the system to find out how are the themes loaded.
Understanding scenemanager
After the failed attempt, I was left with one question:
"How do I tell the system to change environment to the one I want?"
That in mind I started inspecting the list of installed packages still til I stumpled upon com.pvr.scenemanager.
So I transferred it to my PC and disassembled the apk in jadx to turn the APK into readable Java code.
NOTE
JADX is Dex -> Java disassembler to aid reverse engineering Android Packages.
I noticed the package contained the same folder structure as the theme packages, these were the default themes pre-installed on the device, but it also contained code.
So I started searching strings that we discovered previously from the environment package until I stumpled upon function called setCurrentSceneWithPkg:
public void setCurrentSceneWithPkg(String sceneTag, String scenePath, String scenePackage, boolean save) {
    if (save) {
        saveScene(sceneTag, scenePath, scenePackage);
        Settings.Global.putString(
            this.mResolver,
            Constant.KEY_SCENE_CHANGE_TYPE /* scene_change_type */,
            System.currentTimeMillis() + "1"
        );
    }
}
which lead to a function called saveScene:
private synchronized void saveScene(String sceneTag, String scenePath, String scenePackage) {
    // ...
    Settings.Global.putString(
        this.mResolver,
        Constant.KEY_SCENEMARK_FORSHORTCUT /* SceneManager.CurrentScene */,
        sceneTag
    );

    // ...
    Settings.Global.putString(
        contentResolver,
        Constant.KEY_CURRENT_SCENE /* current_scene */,
        scenePath
    );

    Settings.Global.putString(
        this.mResolver,
        Constant.KEY_SCENE_CURPACKGE /* SceneManager.CurPackage */,
        scenePackage
    );

    /* ... */
}
It seemed like the information about the current theme was stored in Global System Settings which meant we could change these values.
Creating custom package and loading it
Once I was armed with all that knowledge, I created a empty Unity scene with Unity 2021.3.5f1 (w/ Pico Unity Integration SDK) and exported a bundle with the help of a script I took from Unity Documentation which I slightly modified to build for Android instead of Windows.
using UnityEditor;
using System.IO;

public class CreateAssetBundles
{
    private string assetBundleDirectory = "Assets/AssetBundles";

    [MenuItem("Assets/Build AssetBundles")]
    static void BuildAllAssetBundles()
    {

        if(!Directory.Exists(assetBundleDirectory))
            Directory.CreateDirectory(assetBundleDirectory);

        BuildPipeline.BuildAssetBundles(
            assetBundleDirectory,
            BuildAssetBundleOptions.None,
            BuildTarget.Android
        );
    }
}
now that I had the bundle I had to create environment package so I took the apk I had transfered from the device and renamed the values in strings.xml and the packageId to something else and then I swapped the unity bundle to my own, and installed the package on my device.
to actually change the theme I had to run the following commands:
adb shell settings put global SceneManager.CurPackage com.pvr.[Name].scene
adb shell settings put global SceneManager.CurrentScene [Name]
adb shell settings put global current_scene /assets/scene/[Name]/Scene_[Name]_1_1.unity3d
Fig 3: Unity Default scene theme loaded on Pico
And let the drums roll, Dududud psst, and it worked! We have a custom unity bundle loaded on the device!
What about the Virtual Environment tab?
Pico keeps track of a list of the official themess on a server, which the OS then requests the lists from, this will populate the Virtual Environment tab. This means that themes only approved by Pico are shown in the Virtual Environment tab.
Pico uses DoH (DNS over HTTPS) which makes DNS redirection hard, on top of the it requiring a system-level root CA override, which is not possible on Android 14 which Pico OS runs on.
So instead I decided to replicate the functionality of the official software with PicoThemeManager.
Fig 4: PicoThemeManager
Conclusion
This was definitely a fun project to work which I was able to reinforce some of my abilities.
If you are interested in using custom themes, please check out PicoThemeManager and Pico Environment Archive
NOTE
Pico Environment Archive is not affiliated with the Author nor PicoThemeManager
If you are interested in creating custom themes, please check out my guide, here.